Assistants
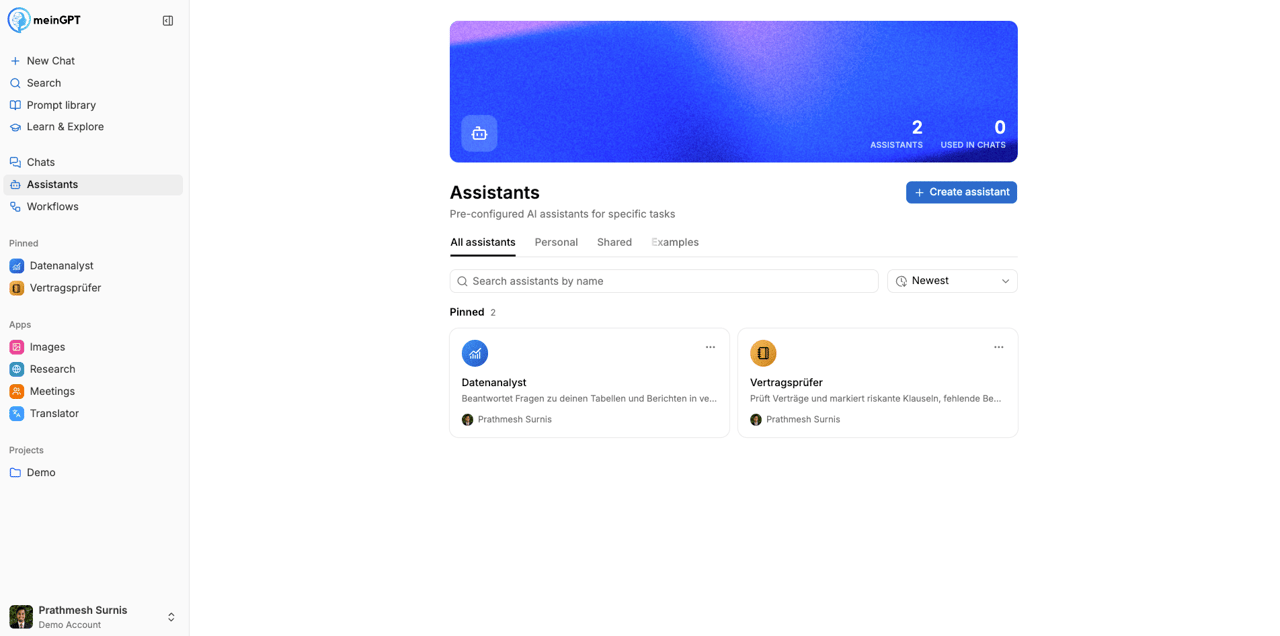
What an assistant is and how to build your first one in a few steps – explained simply for getting started.
An assistant is an AI helper that you set up once and then reuse for similar tasks – for example "reply to emails in the right tone", "summarize offers", or "translate texts into English".
Instead of explaining what the AI should do every single time, you give an assistant fixed instructions once. After that you simply start a chat with it and get going.
Assistant or workflow?
Note
An assistant is flexible – you chat with it freely. A workflow follows fixed steps. Rule of thumb: same sequence every time? → workflow. Free question and answer? → assistant.
Build your first assistant in 5 steps
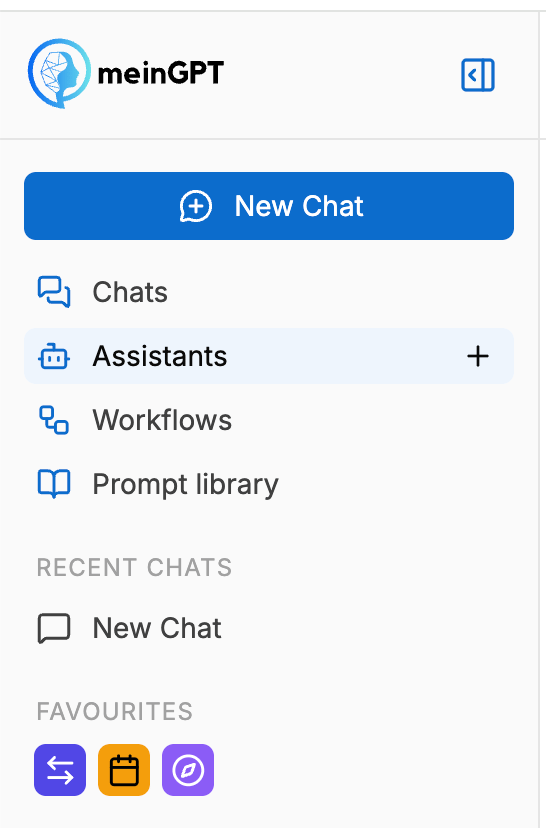
You'll find assistants in the left navigation under Assistants. Click + Create assistant in the top right – the editor opens. Don't worry: you don't have to fill in everything. Only the first three steps are truly required.
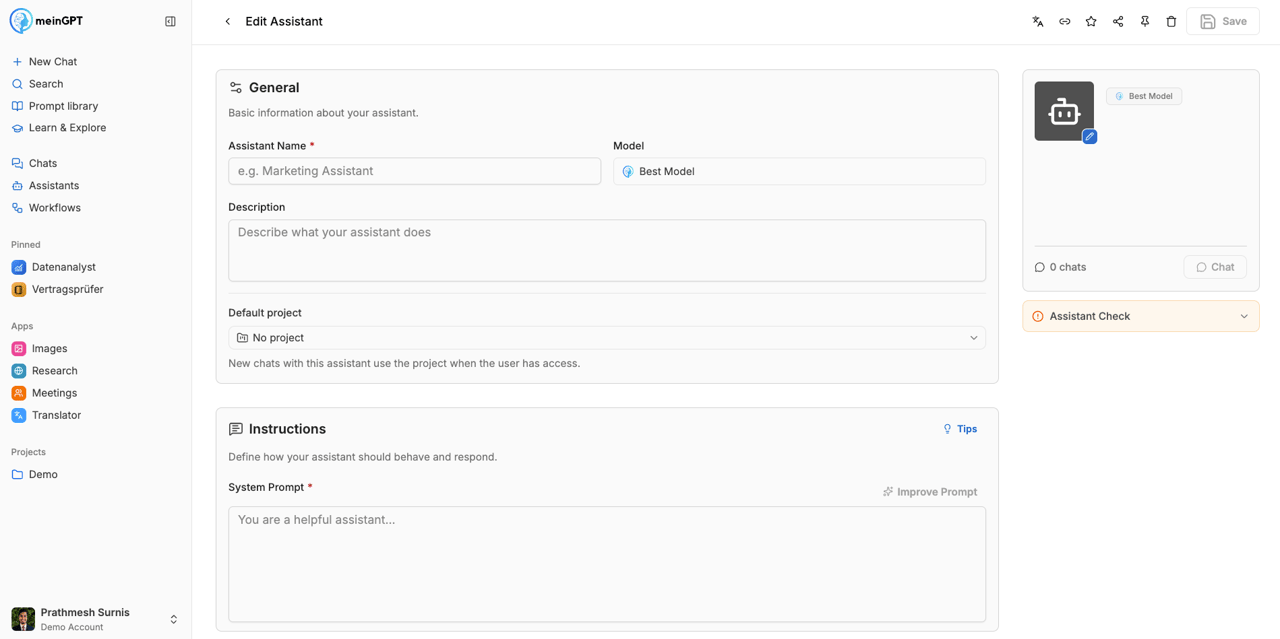
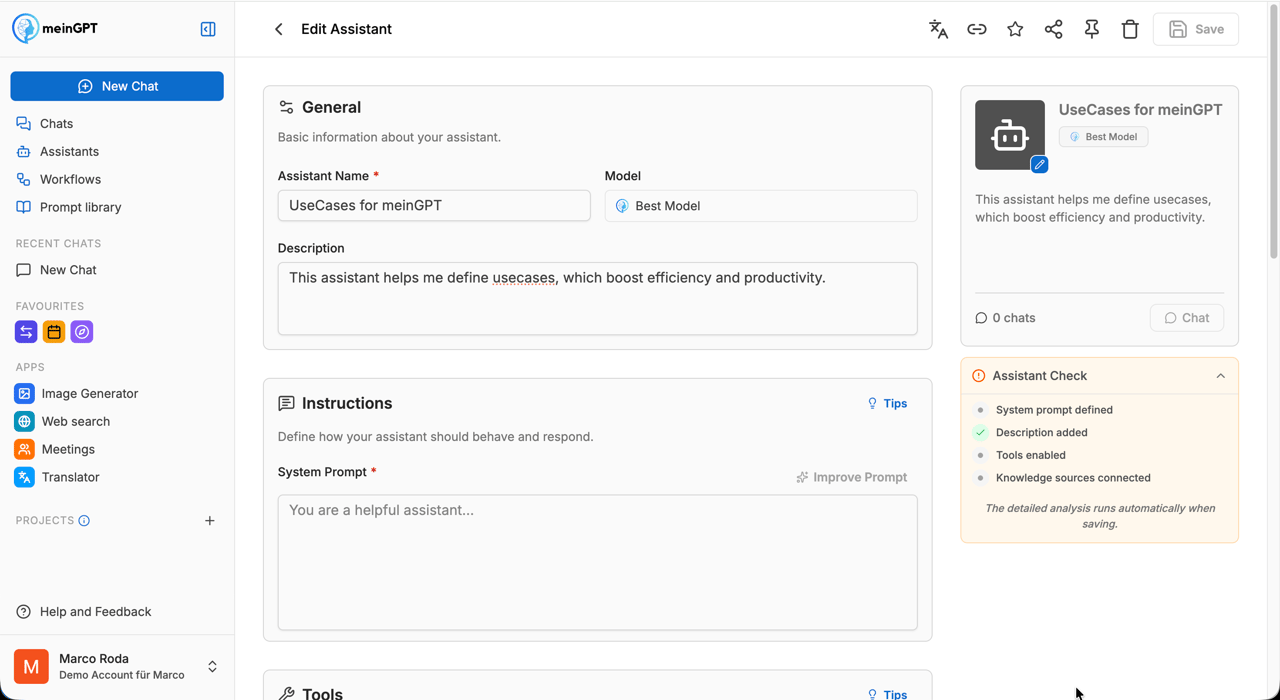
Give it a name and a short description
In the General section, set a name and an icon (avatar) so you can recognize the assistant later. The description helps you – and colleagues you share it with – understand what it's for.
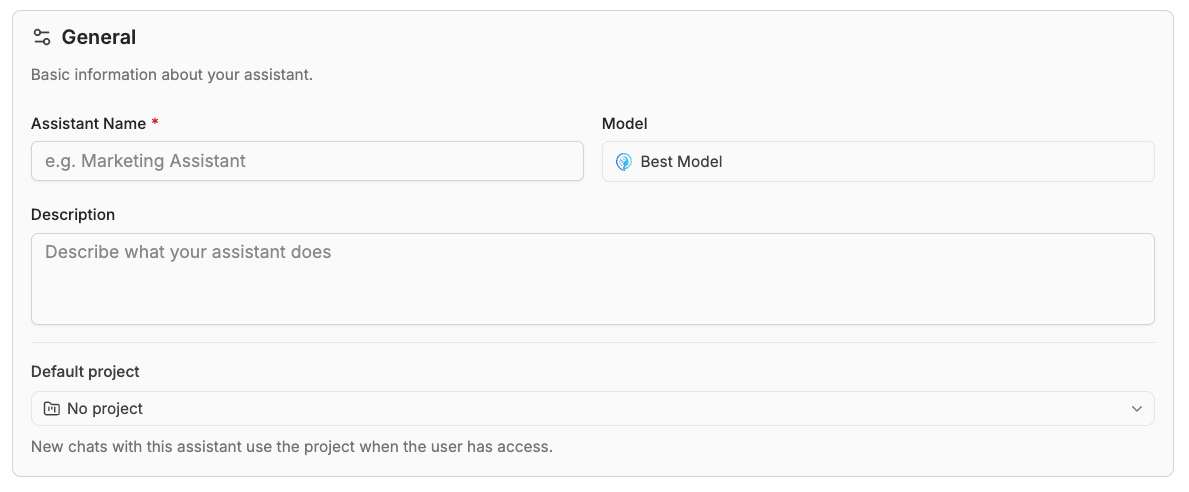
Choose a model (and optionally a project)
The model is your assistant's "brain". If you're unsure, leave Best model on – it selects GPT-5 by default and only switches automatically to Gemini 3.5 Flash-Lite for very long conversations (including attachments). The choice depends on input length, not on task type – for accuracy-critical tasks, pick a specific model manually, see AI models.
Under Default project you can also assign the assistant to a project. New chats with this assistant then automatically use that project – handy when you want to keep related conversations in one place.
Tell it what to do (instructions)
This is the most important step. In the Instructions field (also called the system prompt) you describe the assistant's task in plain words: who is it, what should it do, and how should it respond?
Note
Tip for getting started: Just write as if you were explaining the task to a new colleague. For example: "You are a friendly support agent. Answer customer questions briefly, politely, and in English." The Improve button helps MeinGPT sharpen your prompt.
Optional: add tools and knowledge
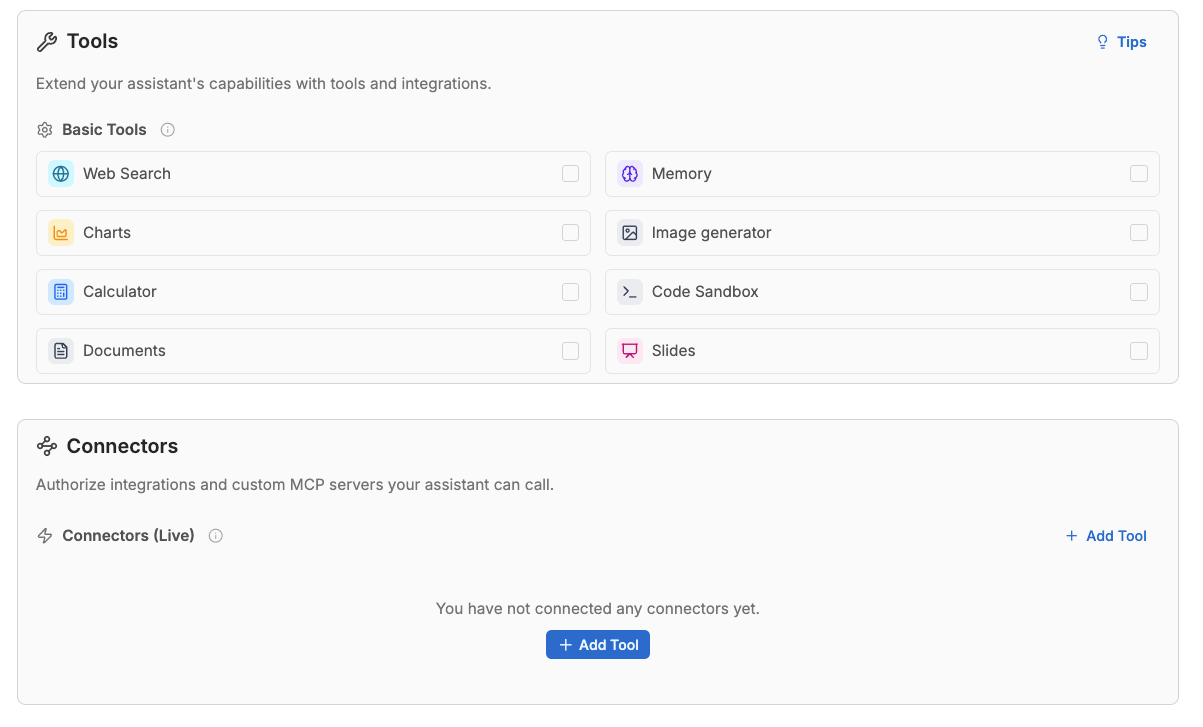
Does your assistant need more than plain chatting? In the Tools section you enable basic tools (e.g. web search, calculator, charts, or Memory for a long-term memory) and connect external services like Microsoft 365 or your own MCP servers via Connectors.
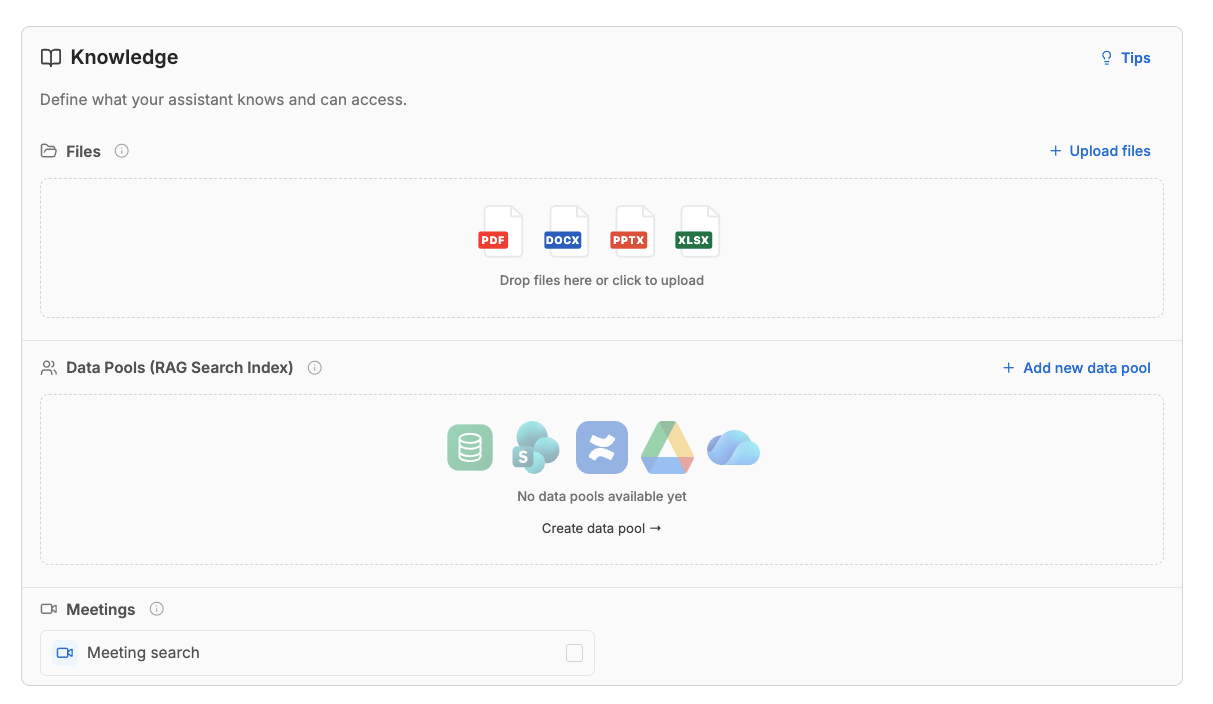
Under Knowledge you give the assistant access to your own content: upload files (PDF, DOCX, PPTX, XLSX) or connect a data pool as a searchable knowledge index. That way it answers questions based on your own documents. For your first assistant, feel free to skip this – we'll look at Memory and Skills in a moment.
Save and try it out
Click Save in the top right. Your assistant now appears under My assistants. Open it, start a chat, and test whether it responds the way you imagined. You can adjust every setting at any time.
The editor in detail
You don't need all of this to get started. But if you want more control, here's every section of the assistant editor – just expand what interests you.
General – avatar, name, model, description
Your assistant's basic information:
- Avatar: the profile image. In the sidebar and favorites you only see the avatar – pick it as a clear distinguishing mark. Click it to adjust color and symbol.
- Name: short and concise so the task is instantly recognizable.
- Model: sets which AI model is used in the chat. Default is Best model – it selects GPT-5 and only switches to Gemini 3.5 Flash-Lite when the context window is exceeded, regardless of task type. For accuracy-critical tasks, pick a model manually instead. More under AI models.
- Description: explains the assistant's task and function – more detailed than the name, understandable to colleagues too.
- Default project: optionally assigns the assistant to a project; new chats then use that project automatically.
Instructions – the system prompt
The Instructions section is your main lever for the assistant's behavior. Here you write the system prompt – the heart of your assistant. A good system prompt contains:
- The persona (the assistant's role)
- The task and how it should be solved
- Additional context
- The response format
Best practice – structure with ## sections. A prompt with clearly separated sections delivers noticeably better results than free-flowing text:
## Role
You are an expert in contract analysis.

## Task
Analyze uploaded contracts and identify risks.

## Rules
- Always answer in English
- Use the data pool for reference documents
- Use the Charts tool for visualizations
System prompts are merged in this order:
- Personal instruction of the user (Preferences → Override System Prompt)
- Predefined Organization Prompt (workspace level, maintained by workspace admins under Settings → AI & features → Chat – tone of voice, company principles)
- Assistant prompt (this configuration – the specific assistant's role and task)
- User input in the chat (the concrete request)
Keep each level focused – duplication leads to fuzzy answers.
Note
Mention tools explicitly in the prompt: an enabled tool is often ignored if it isn't mentioned in the system prompt. Reference it concretely, e.g.: "Use the Charts tool to visualize data when the user asks for charts."
The system prompt has no placeholder or variable syntax (for example, for the signed-in user's name) – it's passed to the model exactly as written. If the assistant should address the user's name or role, write that directly into the prompt or supply it in the chat. The curly-brace {{...}} syntax in the Prompt Library is a different, unrelated feature: it only applies to saved prompts and has to be filled in manually on every use – it doesn't auto-populate from user data either.
Top right, the Improve button optimizes your prompt automatically (structure, wording, completeness); Tips opens context-specific hints.
Tools – tools, connectors, MCP, databases
Here you equip the assistant with capabilities beyond plain answering. Five areas:
- Basic tools: built in and ready to use – calculator, charts, Memory, code sandbox, web search, image generator, and more.
- Connectors (Live): live-API connections to external services (Microsoft 365, Google Workspace, Jira, Confluence, HubSpot, Salesforce) as well as to databases and MCP servers released through an Outpost. They deliver real-time data and perform actions. Overview: All connectors.
- Custom MCP: connect your own MCP servers – for internal systems or special APIs. See Custom MCP Server.
- Databases: direct read access to structured data sources (PostgreSQL, MySQL, tables). See Connect databases.
- Request integration: missing a tool? Request it here.
A database or MCP service released through the Outpost shows up here under Connectors, not under Databases – the Databases tile connects MeinGPT directly, without an Outpost, to a database reachable from the internet. To release an Outpost service, see Outposts.
Retry behavior: if a single tool call fails, the assistant retries it automatically – a red mark on a single tool call is normal and doesn't mean the overall answer failed. Each retry attempt counts as its own step against the assistant mode's limit: if a tool keeps failing – for example because a connected service is currently down – that one tool alone can use up the entire step budget. The response then ends with the notice "Tool call limit reached" and an answer based on the results collected so far (details: "Maximum number of agent steps reached"), even though it can feel like an infinite loop while it's happening – the assistant reliably stops there at the latest.
Memory is one of the basic tools – detailed under Memory. For recurring procedures with your own instructions, templates or scripts, Skills are the next step.
Knowledge – files and data pools
Gives the assistant access to static company knowledge – in two ways:
- Upload files: individual documents via drag and drop. Good for manageable, assistant-specific sets.
- Connect a data pool (RAG search index): larger knowledge volumes via a pre-indexed search index, maintained by admins. Unlike connectors, data pools don't deliver live data but search a prepared knowledge base.
For most teams, the data pool runs on the MeinGPT Cloud and doesn't require a dedicated Outpost – more under Data Sources (RAG). A dedicated Outpost is only needed for on-premise setups, for example with special security requirements. Unsure whether to use a connector or a data pool? See the Integrations guide.
Two things are worth knowing before you upload larger sets: how long processing takes, and how the assistant treats Excel/CSV compared to Word.
Attention
Several or larger files take time. Uploaded files need to be processed before the assistant can use them – with several or larger files, this can take noticeably long. If your set grows beyond a manageable, assistant-specific collection, a data pool is the better choice: it's built for large volumes and syncs in the background, so you don't have to wait for it to finish.
Note
Excel and CSV files are handled differently from Word files. Uploaded Word documents are automatically included in every conversation once processed. Excel and CSV files are not automatically read in this way – the assistant has to actively decide to look them up. If the instructions don't say when and why to do so, the file can end up being silently skipped. State explicitly in the instructions when and for what the Excel or CSV file should be consulted.
File upload limits: Up to 50 files per assistant, each up to 50 MB. Supported formats include PDF, DOCX, PPTX, and XLSX. Older formats like .doc, .xls, and .ppt aren't supported – convert them to .docx, .xlsx, or .pptx first.
If an upload fails, MeinGPT shows an error toast and the file won't appear in the knowledge list. Check the file size and format, then upload it again. If the problem persists, contact support with the error text shown.
If your set grows beyond this limit, a data pool is the right next step: data pools are built for much larger volumes (a default storage budget of 300 GB per workspace) and have no hard limit on the number of files per source.
Advanced options – conversation starters & assistant mode
Two optional levers at the very bottom of the editor:
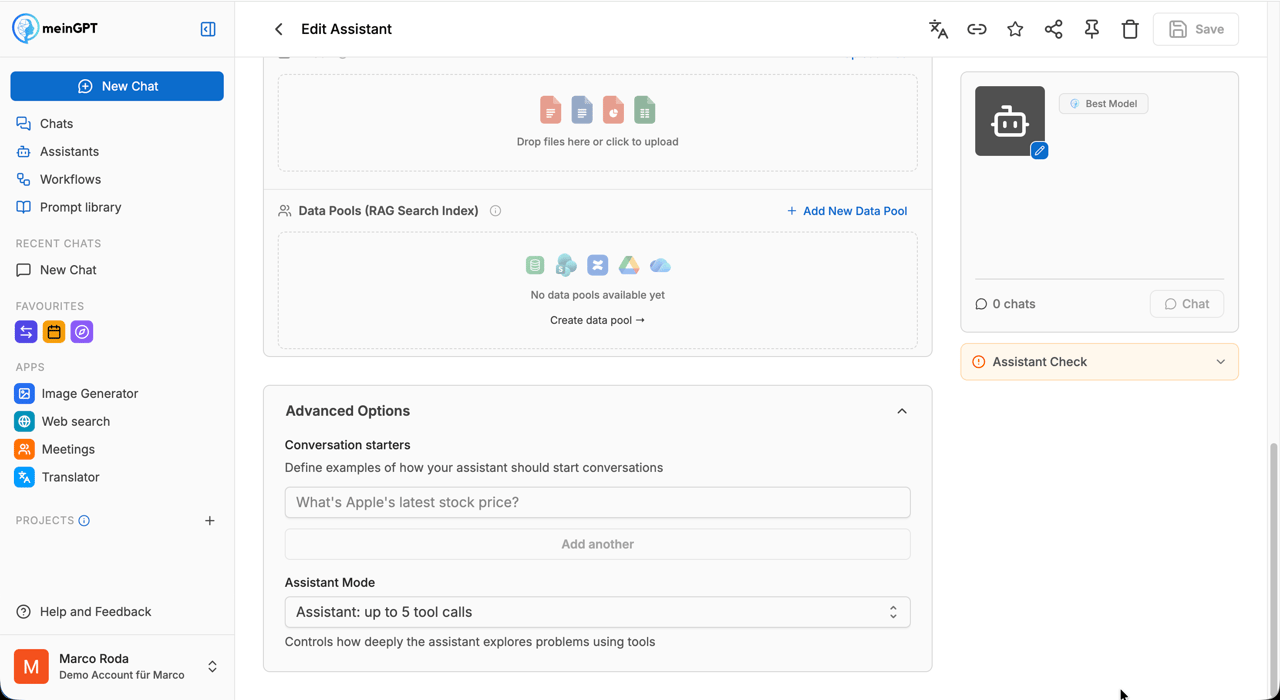
- Conversation starters: predefined opening messages offered when the assistant is opened (e.g. "What is Apple's current stock price?"). Add as many as you like via Add another.
- Assistant mode: controls how many tool calls the assistant makes at most per answer. Default: up to 5 tool calls. Higher values help with complex tasks but cost more time and credits.
Assistant check
The Assistant check in the right sidebar checks live whether the basics are set: system prompt defined, description added, tools enabled, and knowledge sources linked. The detailed analysis also runs on Save.
Memory and Skills: get more out of your assistant
Two optional features turn a simple assistant into a real helper. You can add either one later at any time.
Memory – long-term memory
Your assistant remembers information about you across individual chats – personal and visible only to you.
Skills – custom capabilities
Reusable instructions, optionally with templates and scripts, that the AI loads when a task matches.
Memory
With Memory, your assistant remembers information about you across individual chats – e.g. your role, your working style, or fixed preferences. You enable it in the editor under Tools → Basic tools; once on, the model decides for itself when to search, store, or update memories. Your memories apply to all your assistants that have Memory enabled and are managed centrally on the Memory page in Settings.
Skills
Skills are reusable instructions for the AI – a SKILL.md, optionally with templates and scripts. They live in the skill library (sidebar → Skills) and can be attached to as many assistants as you like. In the editor you find them in the Skills section right below Knowledge:
- Add skill picks an existing skill from the library, Create skill creates a new one (upload a ZIP, write from scratch or create with AI) and attaches it right away.
- By default, the AI loads a skill only when a task matches its description. With the Always on switch it gets the skill's instructions with every answer – useful for rules that should always apply, such as tone or formatting requirements.
- Use the × to remove a skill from the assistant; it stays in the library.
Anyone who uses the assistant can use its skills in the chat, even without their own access to the skill. Skills that consist of instructions only work without the code sandbox; skills with scripts need it.
Using assistants
Once your assistant is saved, you can use, share, and manage it.
Start a chat
There are several ways:
- Click the profile image under Favorites.
- Directly from the Preview top right on the editing page.
- Select it under My assistants and start with a conversation starter or your own message.
- In a general chat, pick an assistant via the model selector bottom right.
- In a running chat, type
@and pick the assistant (applies to that one message).
Clicking the card under My assistants starts a chat directly – the most common action.
Edit an assistant
Since an assistant is used far more often than edited, clicking the card is reserved for starting a chat. You reach the configuration via the three-dot menu (⋮) on the card → Edit assistant. The menu only appears if you have edit rights; for assistants shared as Can use, it isn't available.
Favorite
Click the star on the card. Favorited assistants appear in the Favorites area of the sidebar with their avatar – the chat is start-able with one click.
Share
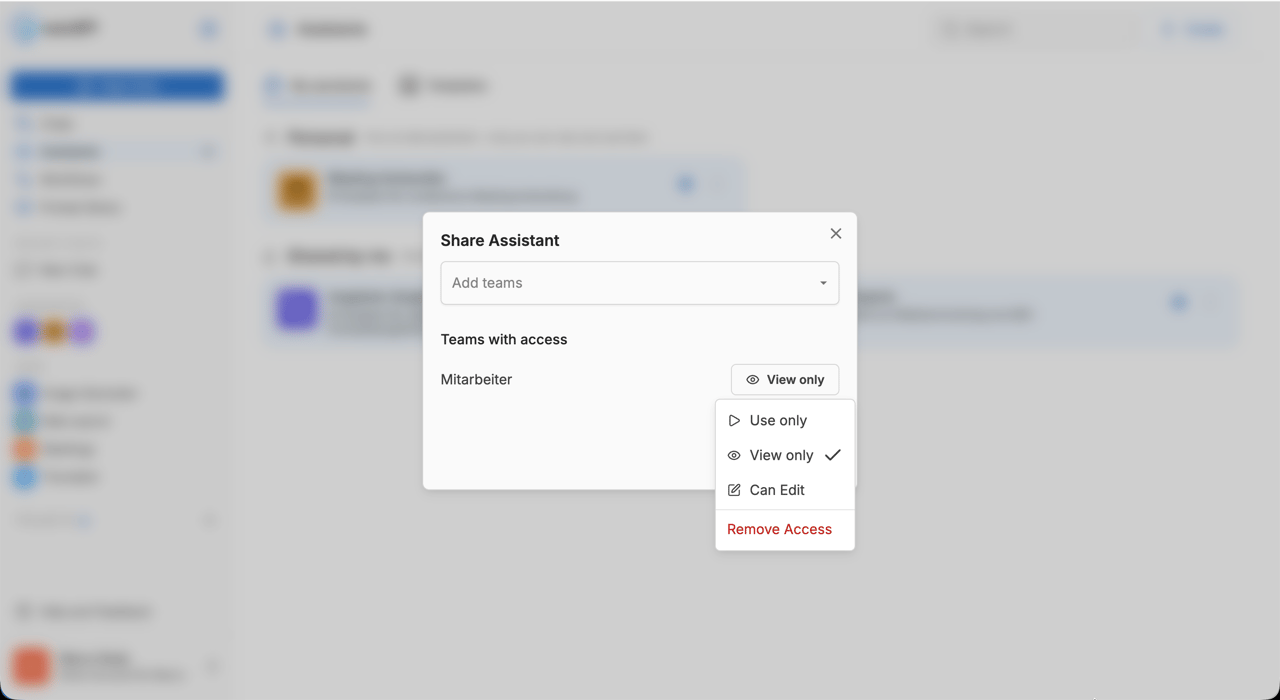
In two steps: click the share icon (on the card or in the editor top right), then search for people or teams and choose the access type:
- Can use – use it, but can't view or edit the configuration
- Can view – view it, but can't use or edit it
- Can edit – use, change, and manage its shares
Workspace admins can also share with everyone in the workspace (org-wide is limited to Can use or Can view). The dialog shows all active shares; removing the workspace-wide share must be confirmed.
Import via link
Assistants can be added via a shareable import link. Create links with the Assistant Creator. The import page supports the parameters c (compressed, recommended) and p (legacy). Details: Assistant Creator.
Pin to the sidebar (admins)
Workspace admins can pin shared assistants to the Apps area of the sidebar – they then appear there as standalone chatbot apps. Pin via the pin icon (📌) in the card header or the editor toolbar; unpin via the same icon or the context menu. Pinned assistants remain visible only to people who already have access to them – normal permission checks still apply. Pinned assistants can only be deleted after unpinning.
Delete
You'll find Delete in the three-dot menu (⋮) on the card. A confirmation dialog asks once more before the assistant is permanently removed.
If the assistant is pinned to the sidebar, the Delete entry is disabled – unpin it first via Unpin from sidebar (see above), only then can it be deleted.
A share (to people, teams, or the whole workspace) does not restrict deletion for you as the owner.
Multiple languages
You can offer the same assistant to international teams in multiple languages without duplicating it: title, description, and conversation starters can be stored translated. On opening, the variant in the workspace's or user's language is shown. The system prompt is not translated; it applies as a single version to all languages.
Access via API
Via the MeinGPT API you call assistants from your own applications or automations (e.g. Make). The AssistantID is in the browser URL in edit mode after /assistants/ (e.g. .../assistants/abc-123 → ID abc-123). Full reference: Assistants API.