Slide templates
Prepare, upload, and manage workspace slide templates so that the AI generates decks in your design
Slide templates define how every deck created with the Slides feature looks in your organization. A well-prepared template gives the AI a clear set of layouts, so new presentations come out in your corporate design out of the box.
This page is for anyone curating slide templates for your organization — typically workspace admins. How end users pick a template inside the chat is described in Slides.
Where templates live
You'll find the overview of all templates in your workspace under Account → Slide Templates. To reach the account area, open Profile Settings from the avatar menu in the bottom left of the sidebar. Templates themselves remain workspace-wide — only the path to them runs through the account area instead of settings.
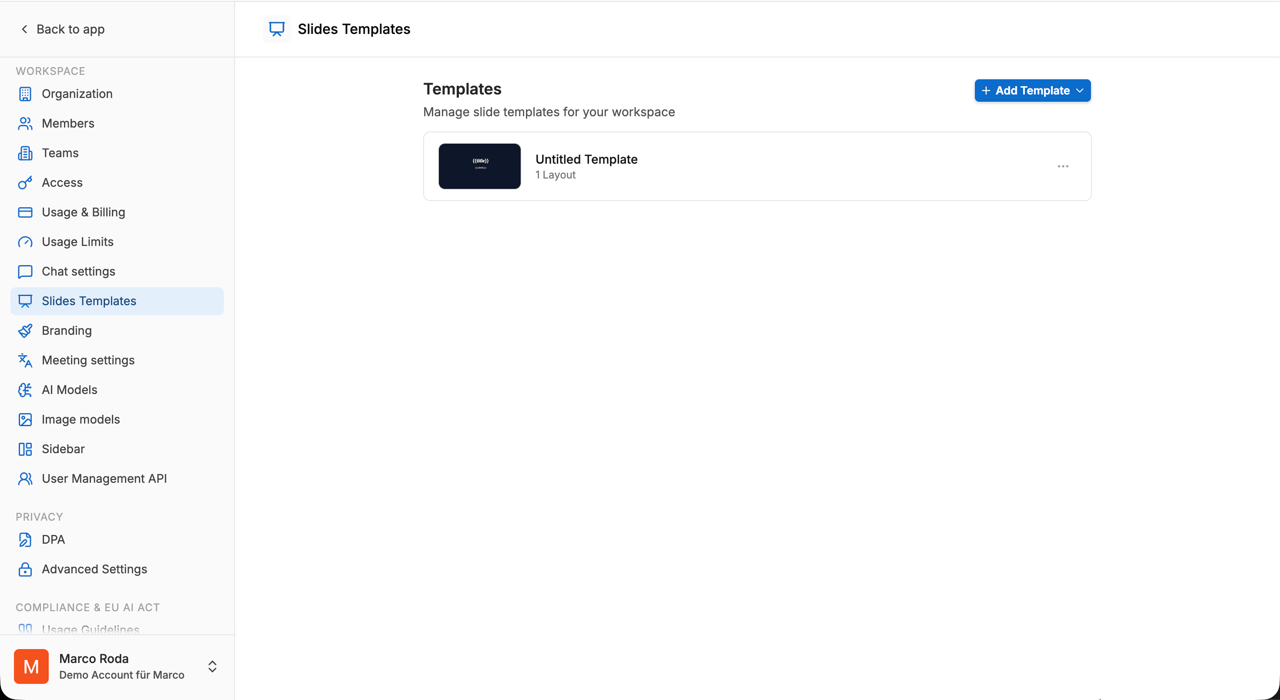
Use Add Template to either import a PowerPoint file or create a blank template manually.
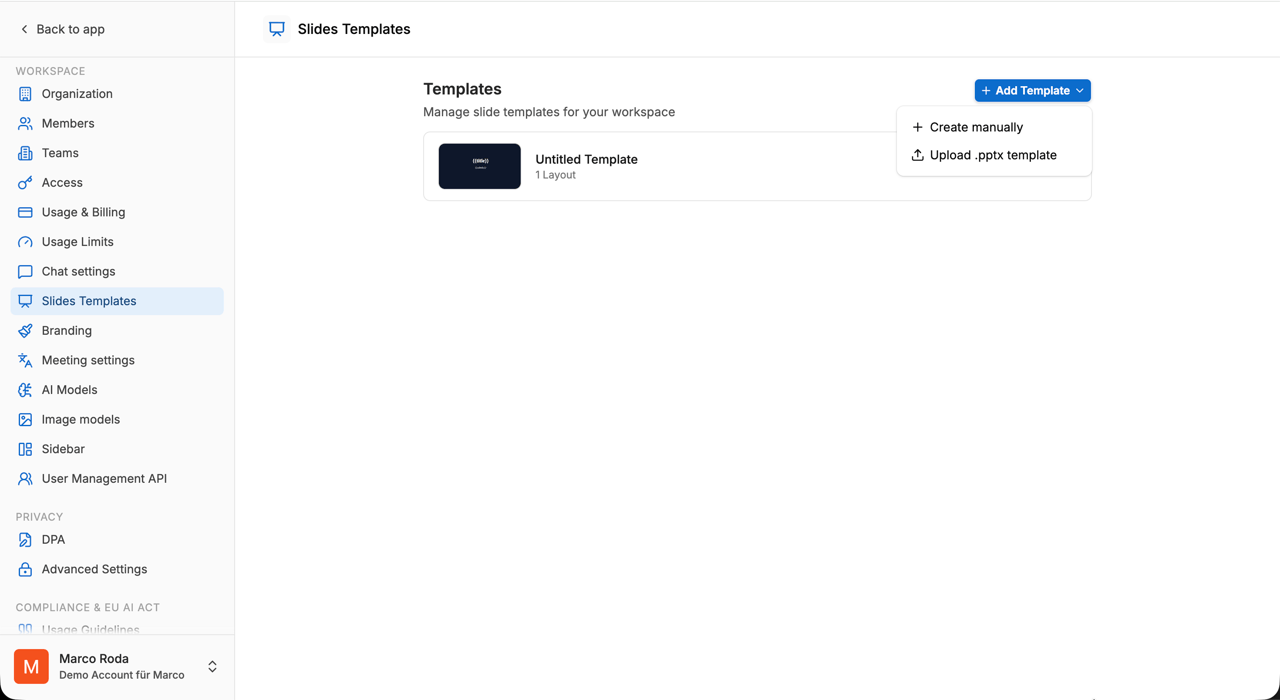
- Upload .pptx template — your PowerPoint file is converted into the internal slide model. Layouts, backgrounds, colors, placeholders, and speaker notes are preserved.
- Create manually — creates an empty template with one starting layout that you can then design in the built-in editor.
What makes a good template
There is no special template format you have to follow — any standard PowerPoint file works. The recommendations below noticeably improve the result:
- Few, but distinct. Keep only the slides that show a standalone layout (e.g. a title slide, a content slide, a two-column layout, a comparison layout, a closing slide). Repetitions of the same layout, or pure section dividers, can be removed from the template — they confuse the AI when it picks a layout, bloat the template unnecessarily, and increase token costs at generation time.
- One layout, reused as many times as needed. A single kept slide (e.g. one "Section Title" layout) is not limited to appearing once — the AI can select and clone it for every slide of that type the deck needs (e.g. one chapter divider per chapter). You only need one example of each distinct layout in the template, never one copy per repetition.
- Mark placeholders with
{{...}}. For the AI to automatically fill in a placeholder, type{{title}},{{subtitle}},{{body}}, or{{image}}directly into the text box in PowerPoint as visible text — exactly as written, including the double curly braces. Simply renaming the underlying PowerPoint object (e.g. via the Selection Pane) has no effect; only the box's visible text matters. After import, check the built-in editor to confirm it worked: a correctly entered placeholder still shows as{{title}}there; if a box shows regular text instead, it wasn't recognized as a placeholder. The name of a slide itself (e.g. “Title Slide”, “Two Column”, “Closing”) is carried in the speaker notes as__layout_name__:Title Slide; this name survives a round trip through PowerPoint as well. - Set each slide's behavior. In the built-in template editor, mark each slide as Required or Optional layout, and as Editable or Fixed:
- Required slides always appear in generated decks. The requested slide count includes them.
- Optional layouts are removed when the presentation does not need them, so unused template slides do not remain empty.
- Editable slides can be filled by the AI.
- Slides marked Fixed are protected from AI edits. Combine Required and Fixed for legal notices, contact pages, or closing slides that must always remain intact.
Attention
As soon as any single slide is marked "Fixed", the whole template's color and font theme is frozen. The AI can no longer propose new background colors, accent colors, or fonts for the deck — not even for the other, non-fixed slides. Individual slide backgrounds remain editable as long as that specific slide isn't fixed, but the overall palette (background color, theme colors, font color, font name) stays exactly as you set it up in the editor. The visual variety of the result is capped by how varied your template already is. For visually appealing decks:
- Build several clearly distinct layouts with different background colors or images (e.g. one full-bleed image layout, one with a colored accent block, one plain white) — the AI picks among these to match the content, but won't invent new colors on top.
- Use
{{image}}placeholders wherever a photo or graphic makes the biggest visual difference (title slide, section dividers). A template with only{{title}}/{{body}}text placeholders stays a text-only deck no matter how well it's configured. - Mark Fixed only on the slides that truly must stay untouched (e.g. a legal notice or closing slide) — not on the whole template — so the theme colors remain adjustable for the rest of the deck.
Besides the color-theme lock, there's a second, independent limitation that comes from the import step itself:
Attention
Complex PowerPoint elements may not survive import. Very advanced elements — e.g. SmartArt, embedded objects, animations, transitions, or nested groups — may be simplified or dropped when converted into the internal slide model. For a reliable template, stick to clear, flat layouts using text, shapes, images, tables, and charts, plus common fonts.
Fonts
The editor offers a fixed selection of fonts, for example Inter, Arial, Calibri, Georgia, Montserrat, Poppins, or DM Sans. Custom fonts, such as the house font of your corporate design, can currently be neither uploaded nor entered by name.
This also applies to import: if your PowerPoint file uses a font that is not in the selection, MeinGPT replaces it with Inter during import. If you need a custom font, pick the closest font from the selection for the template, or export the finished presentation as PPTX — native and change the font in PowerPoint on a computer where it is installed.
Manage templates
The ⋯ menu on a template offers the following actions:
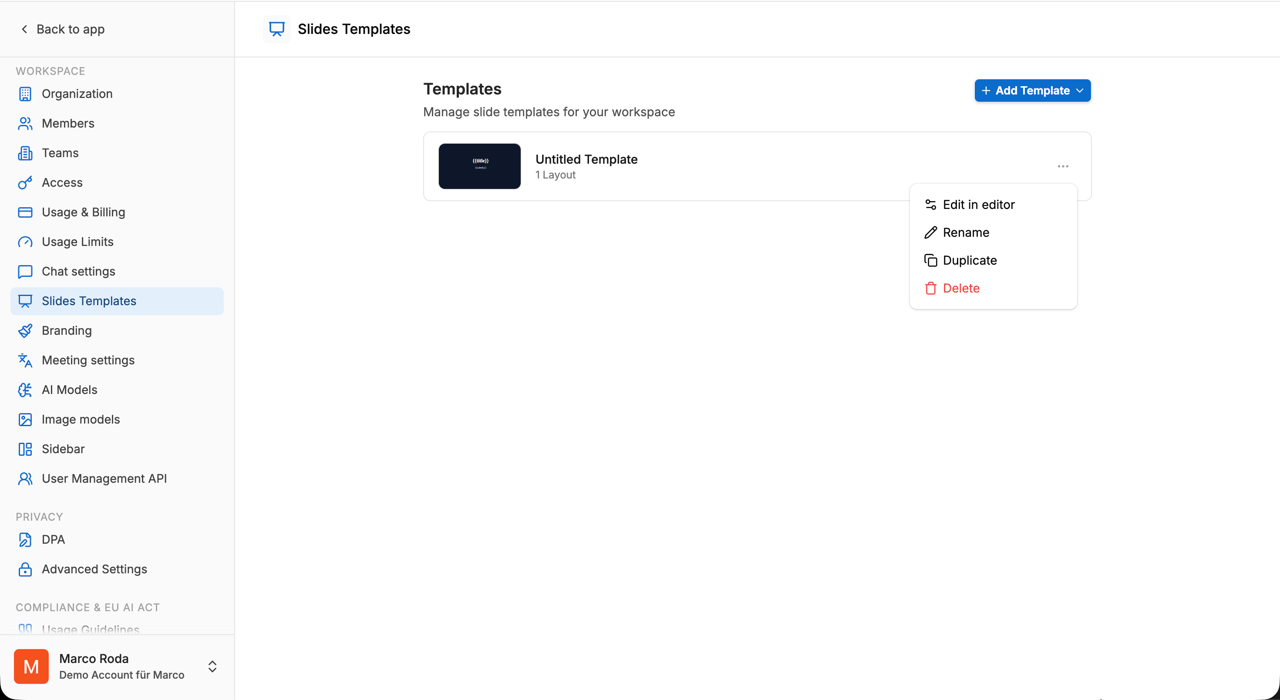
- Edit in Editor opens the template in the built-in slides editor.
- Rename changes only the displayed name, not the content.
- Duplicate creates an editable copy — useful for spinning up a variant without losing the original.
- Move to shared / private moves the template between your private templates and the shared workspace templates (see the “Sharing templates” section below).
- Delete removes the template; existing decks that were generated from it stay untouched.
Sharing templates
Every template has one of three visibility states. In the overview you can tell them apart by the My templates and Shared templates sections.
- Private (default) — only you, the creator, see the template. It lives under My templates.
- Auto-shared — when you attach a template to an assistant or workflow step that is shared with your workspace, it is automatically made available to everyone who can use that assistant. If the last such reference is removed, the template reverts to private — unless it is in the organization library.
- Organization library — as an admin, you make a template permanently available to everyone via the ⋯ menu → Move to shared. It then appears for everyone under Shared templates and stays shared regardless of references.
Templates in the organization library can be edited and removed by any admin — even admins who did not create them. Move to private returns a template to its original creator and detaches it from the assistants and workflows that used it.
Edit in the built-in editor
In the editor, you can edit background, colors, text, shapes, images, tables, and charts per layout. Changes are saved automatically.
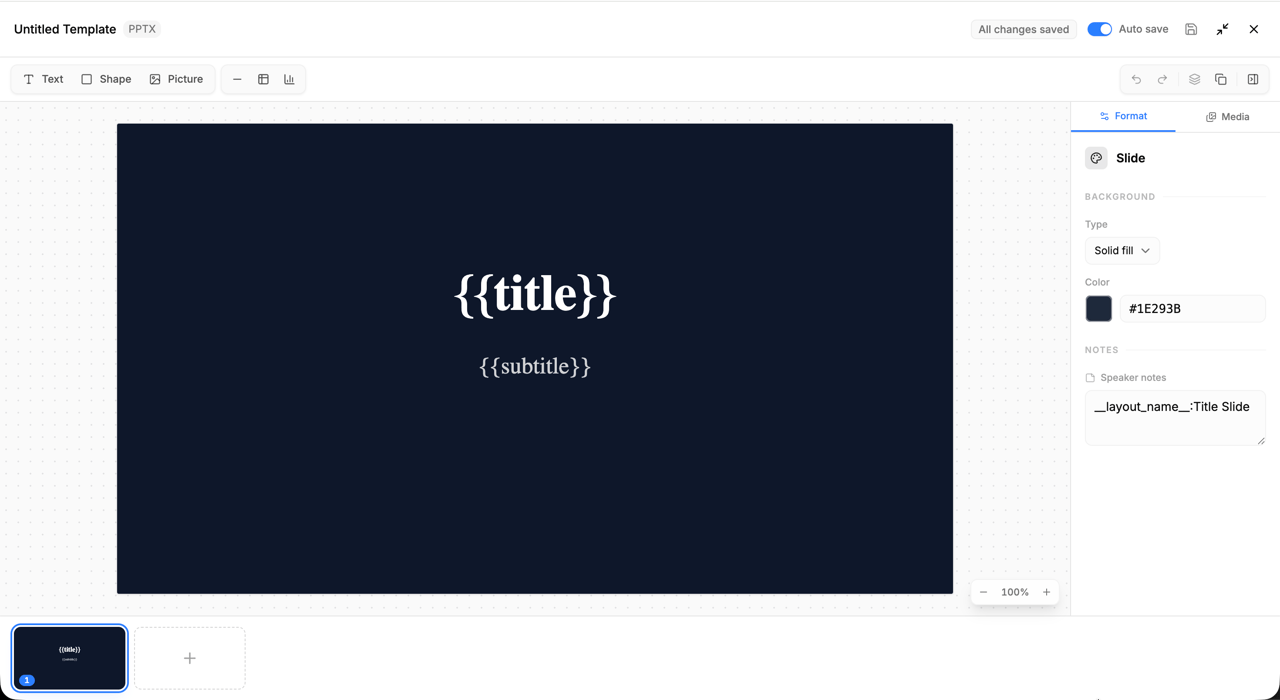
What you see here is the layout vocabulary the AI gets to work with: required slides are always retained, optional layouts are selected only when needed, and every editable placeholder becomes a named slot.
How the AI uses the template
Once a template is saved, end users can select it in the chat: they turn on Slides in the tools menu, then pick a template from the list that appears. The AI then generates decks based on the stored layouts and placeholders.
The end-user workflow and an example flow are documented under Slides.
If a template doesn't work as expected
If a deck generated from a template comes out empty, incorrectly filled, or differently formatted than expected, check the following in order:
- Deck looks flat or lacks color variety overall? Check whether one of your slides is marked Fixed — that freezes the theme colors for the entire template (see the note above under "What makes a good template"). Apply Fixed only to individual slides, not accidentally to all of them.
- The same layout looks different on its 2nd, 3rd, … occurrence in one deck (e.g. later chapter dividers deviate in logo, positioning, or styling from the first)? This is a known limitation, not a configuration you're missing: there is currently no setting that locks repeated instantiations of one layout to stay visually identical to the first — a system-prompt instruction alone cannot guarantee it. If this happens, note the affected chat link when contacting support so it can be tracked.
- Is the placeholder actually typed as
{{...}}? Today, MeinGPT recognizes a placeholder if{{title}},{{subtitle}},{{body}}, or{{image}}was typed literally as the box's visible text — renaming the underlying PowerPoint object alone is not enough. Open the template in the built-in editor (see "Edit in the built-in editor") and confirm your placeholders actually show up as{{title}}, etc. - Remove unusual elements. SmartArt, embedded objects, animations, or heavily nested groups (see the note above) can interfere with import. Try a simplified copy of the template without these elements.
- Split up or shrink large files. Very large or deeply nested templates can run into import issues. Try reducing the template to a few slides to narrow down the cause.
- Contact support. If you can't narrow down the cause, reach out to support with the affected chat link and, if possible, the template file you used.