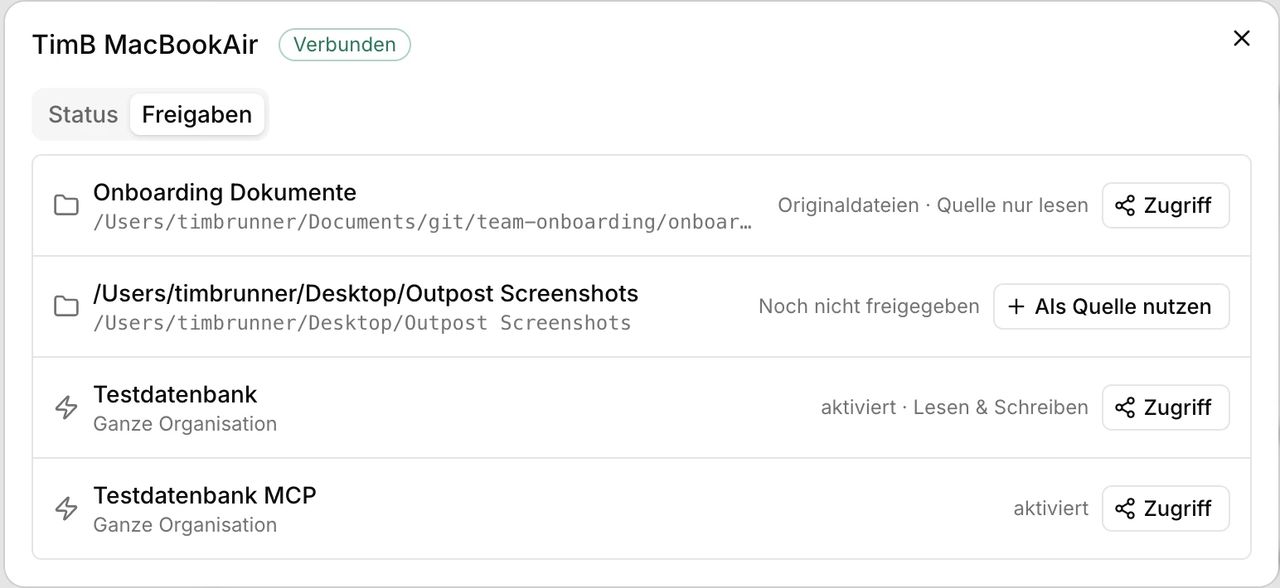
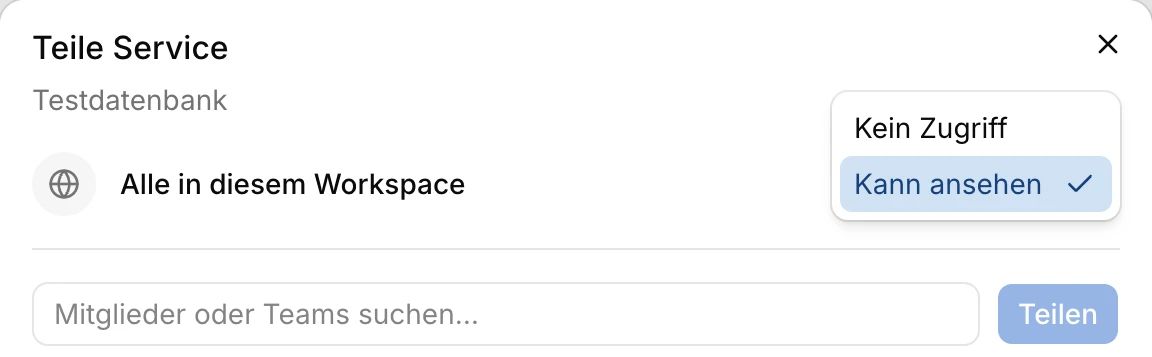
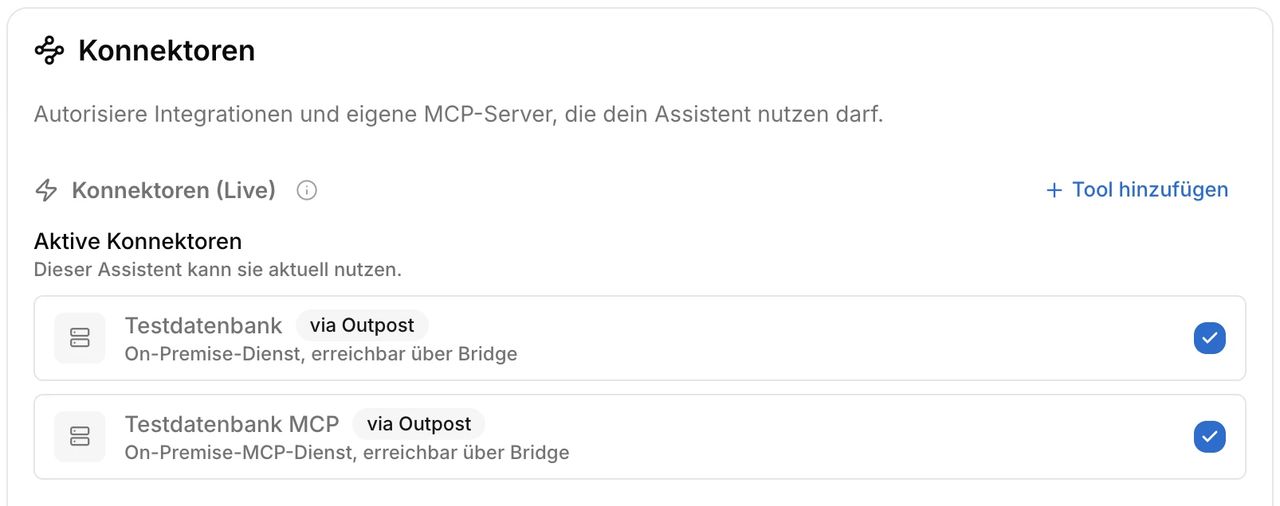
How a service is created in the Outpost, shared in MeinGPT, and then used in an assistant or chat.
Besides folders, an Outpost can also pass through services: a database, a local MCP server, or an internal HTTP API. A folder delivers searchable text; a service delivers a live connection — MeinGPT sends a request to your system when needed and gets the answer back at the moment it's needed.
Services are not enabled by default
A service only appears once the controlled services preview is enabled for
your workspace. Without that, sharing in the Outpost shows only A folder
as an option.
Unlike a folder, sharing it in the Outpost alone isn't enough — a service passes through three stations before anyone can use it:
Where
What
1
In the Outpost
Share the service — provide the target or connection URL and decide what it releases.
2
In MeinGPT
Grant people, teams, or the whole organization access to the reported service under Shares.
3
In the assistant or chat
Enable the connector — only then can a response actually use it.
Credentials and the local target URL never leave the Outpost machine. Only the name, service type, and what you mark as allowed in step 1 reach MeinGPT — never the password from a connection URL or the target itself.
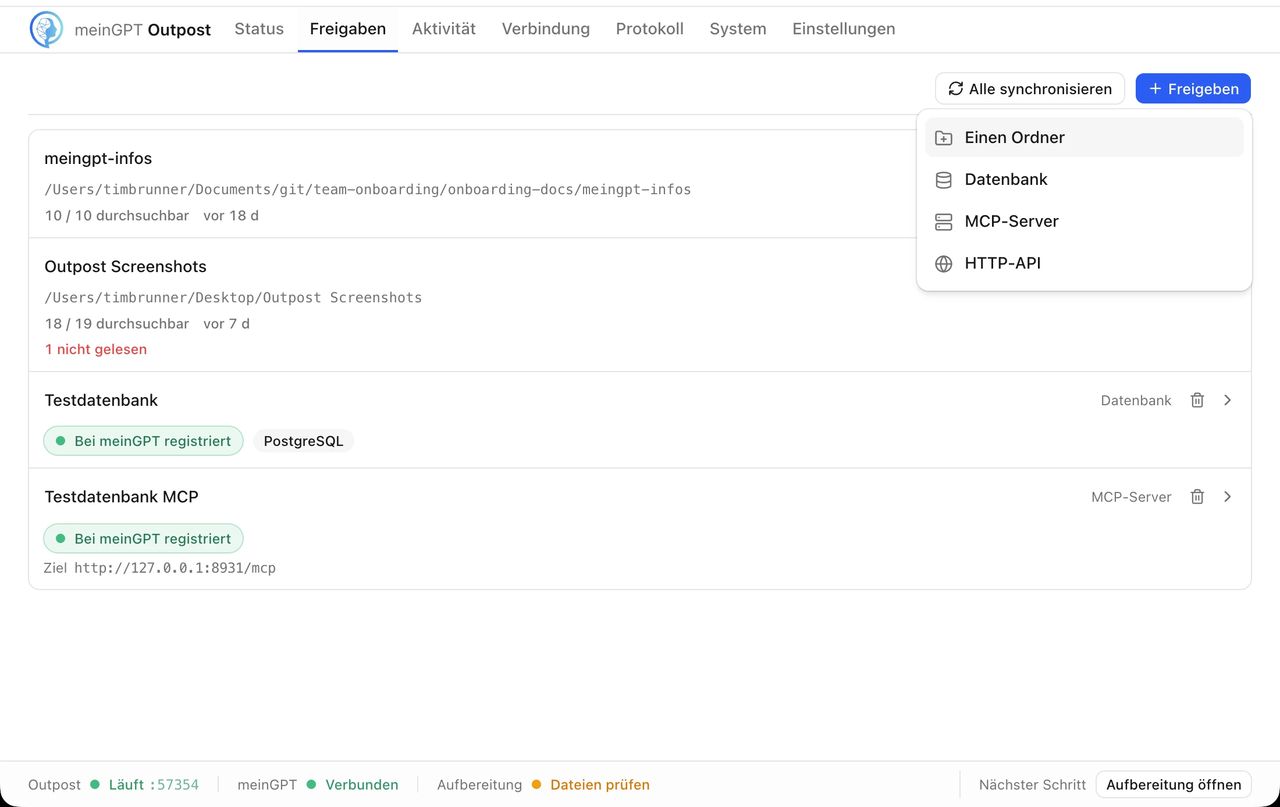
Shares tab → Share. With the services preview enabled, a menu opens with four choices: A folder, A database, An MCP server, and An HTTP API. Pick the matching service type.
Set up the connection
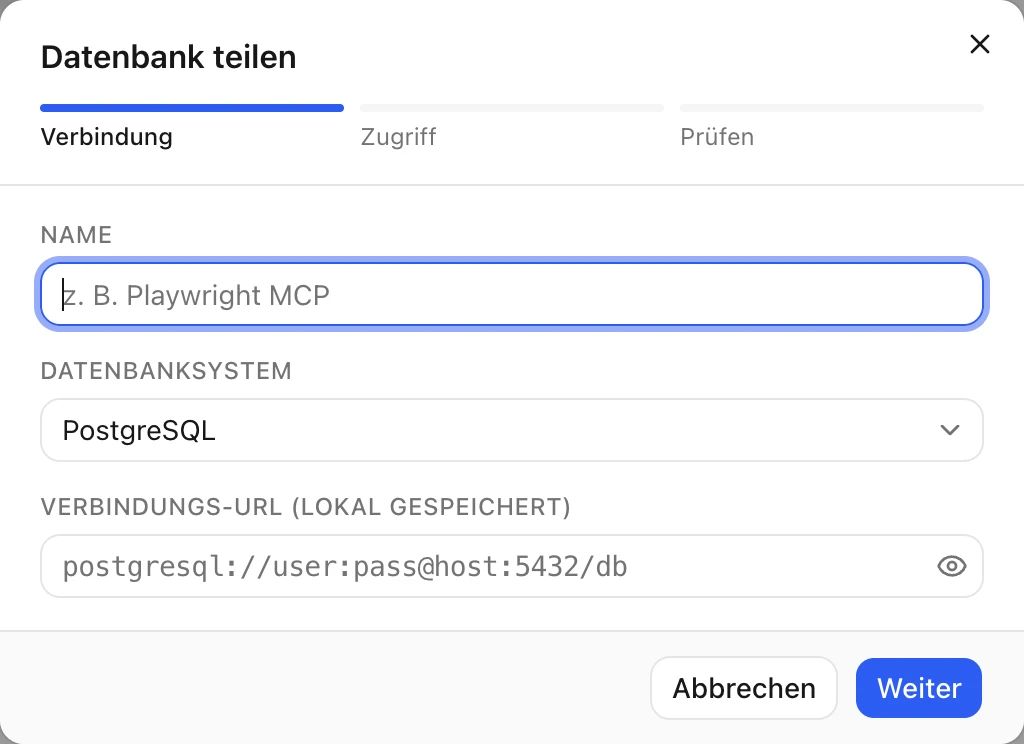
The wizard first asks for a name — it later appears exactly like this in MeinGPT and in chat, so pick something understandable (e.g. "Playwright MCP" rather than an internal shorthand).
Database system: PostgreSQL, MySQL, or Microsoft SQL Server.
Connection URL (stored locally) — depending on the system, e.g.:
The field is masked like a password field and is never shown again after saving — not even in MeinGPT. Use a dedicated database role for this service rather than a personal account.
Microsoft SQL Server: named instances and SQL Server Express
Named instances such as SERVER\SQLEXPRESS are not supported in the connection URL, because the Outpost does not use the SQL Server Browser service. Use the host name with the instance's fixed TCP port instead, e.g. sqlserver://user:pass@SERVER:1433/db.
SQL Server Express ships with TCP/IP disabled and uses dynamic ports. In SQL Server Configuration Manager, enable TCP/IP under the instance's protocols, clear TCP Dynamic Ports under IP Addresses → IPAll, enter a fixed TCP Port, and restart the service. Port 1433 only works if no default instance on the server already uses it; otherwise pick another one, e.g. 14330.
Authentication: Only SQL Server logins with username and password are supported, not Windows authentication. Switch the server to "SQL Server and Windows Authentication mode" and create a dedicated login that has only the db_datareader role in the database. As long as you don't allow writes (INSERT, UPDATE, DELETE), the Outpost checks that the login cannot write: logins such as sa, db_owner, db_datawriter, or logins with EXECUTE rights on procedures are rejected with "The selected read-only access needs a role that cannot write".
Encryption: The connection is encrypted by default and validates the server certificate. Out of the box, SQL Server Express uses a self-signed certificate that fails this check. The proper fix is a certificate issued for the host name that the Outpost machine trusts. Only as a stopgap, append ?trustServerCertificate=true to the URL: the connection stays encrypted, but the server's identity is no longer verified. No URL parameters other than encrypt and trustServerCertificate (each true or false) are allowed.
Special characters such as @, :, /, ?, #, or % in the username or password must be URL-encoded, e.g. @ as %40.
Invalid URL: If the check reports "Configuration is invalid", the share can't be re-checked. Remove it and add it again with the corrected URL.
Set the access level
You decide what the service may release on the same screen — differently per service type:
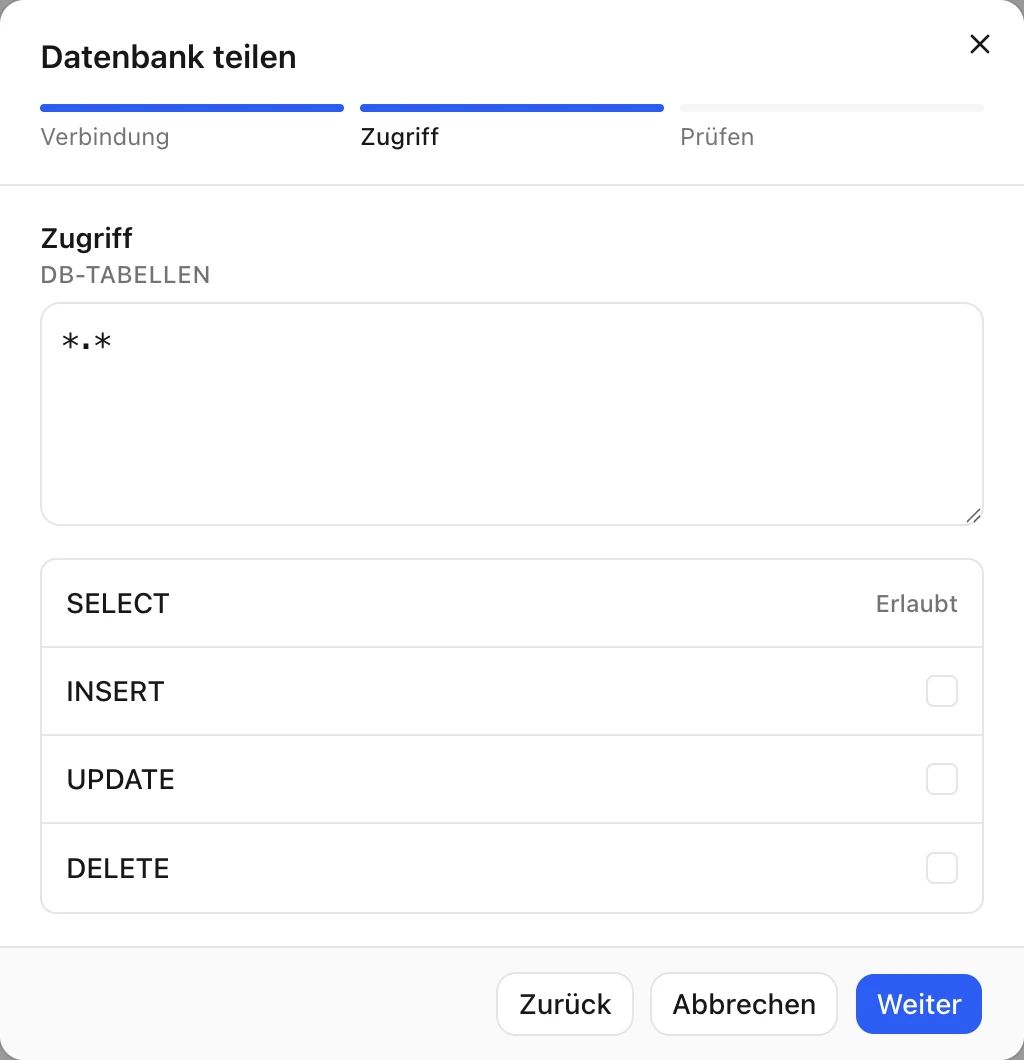
Released tables, one per line in schema.table format, e.g.:
public.customers
public.orders
* acts as a wildcard for the schema or the table — the default value *.* releases every table at first; narrow it down to the tables you actually need. Up to 500 entries.
Below that: SELECT is always allowed for every listed table. INSERT, UPDATE, and DELETE are individually toggleable checkboxes — they then apply to all listed tables together, not per table.
Review and add
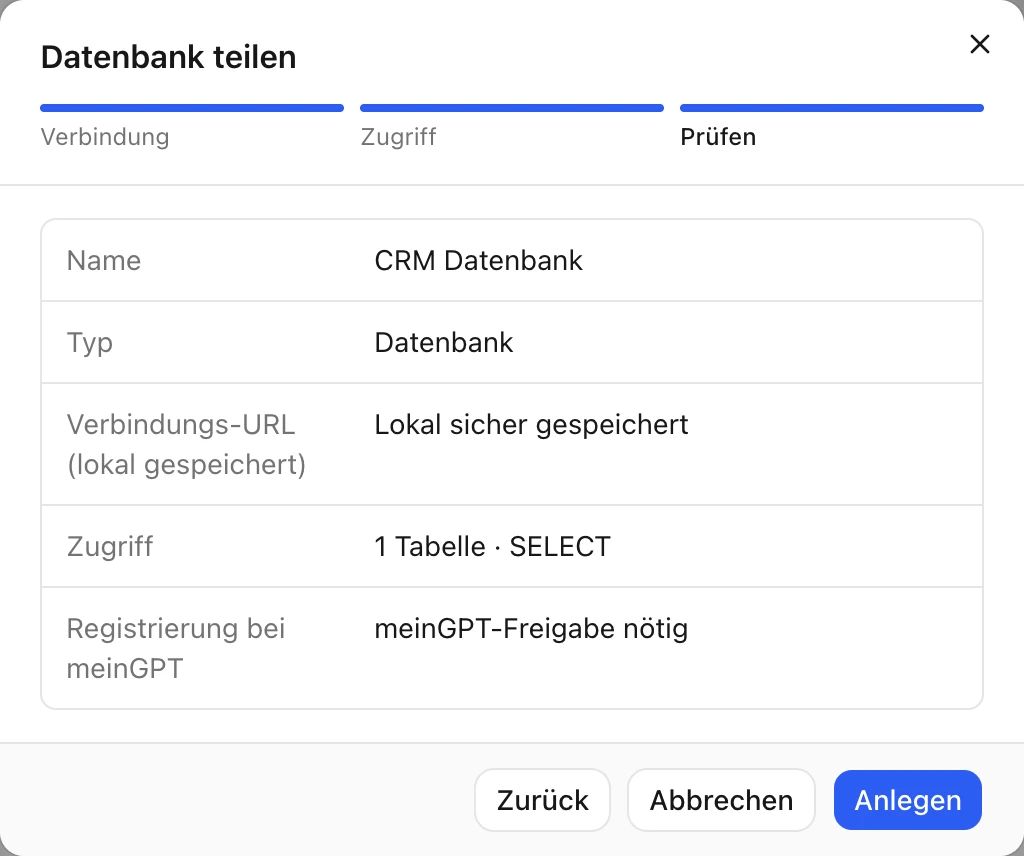
The last step summarizes the name, service type, target, and the access you just set. Add registers the service with MeinGPT — it isn't visible to anyone yet. That's the next step.
Settings → Outposts → Manage → Shares. The service is listed there alongside the folders in the same list, marked with a lightning-bolt icon. Click Access and add the people or teams who may use it — or share it with the whole organization. Without this step, the service stays registered but unusable by anyone.
Open the assistant editor, Tools → Connectors section. A service you've shared appears there tagged "via Outpost" — enable the row to let the assistant use it. There's no separate login or connection to make here: the connection already exists, this step only grants usage permission for this assistant.
For an MCP server, the released tool list can be narrowed further per assistant here — never widened beyond what you set in the Outpost. General information on tools and connectors in the assistant editor: Assistants.
After that, any response using this assistant can call the service — run a database query, execute an MCP tool, or hit one of the released HTTP routes — within the limits you set in the Outpost.
"Registered" and "reachable" are two separate states — a service can appear in MeinGPT and still not respond, for example because the local target isn't running right now. How to narrow that down with Check connection in the Outpost console, and what the most common error messages mean, is at Check a database, MCP, or HTTP service.